Guidewire Payments API Guide: Overview
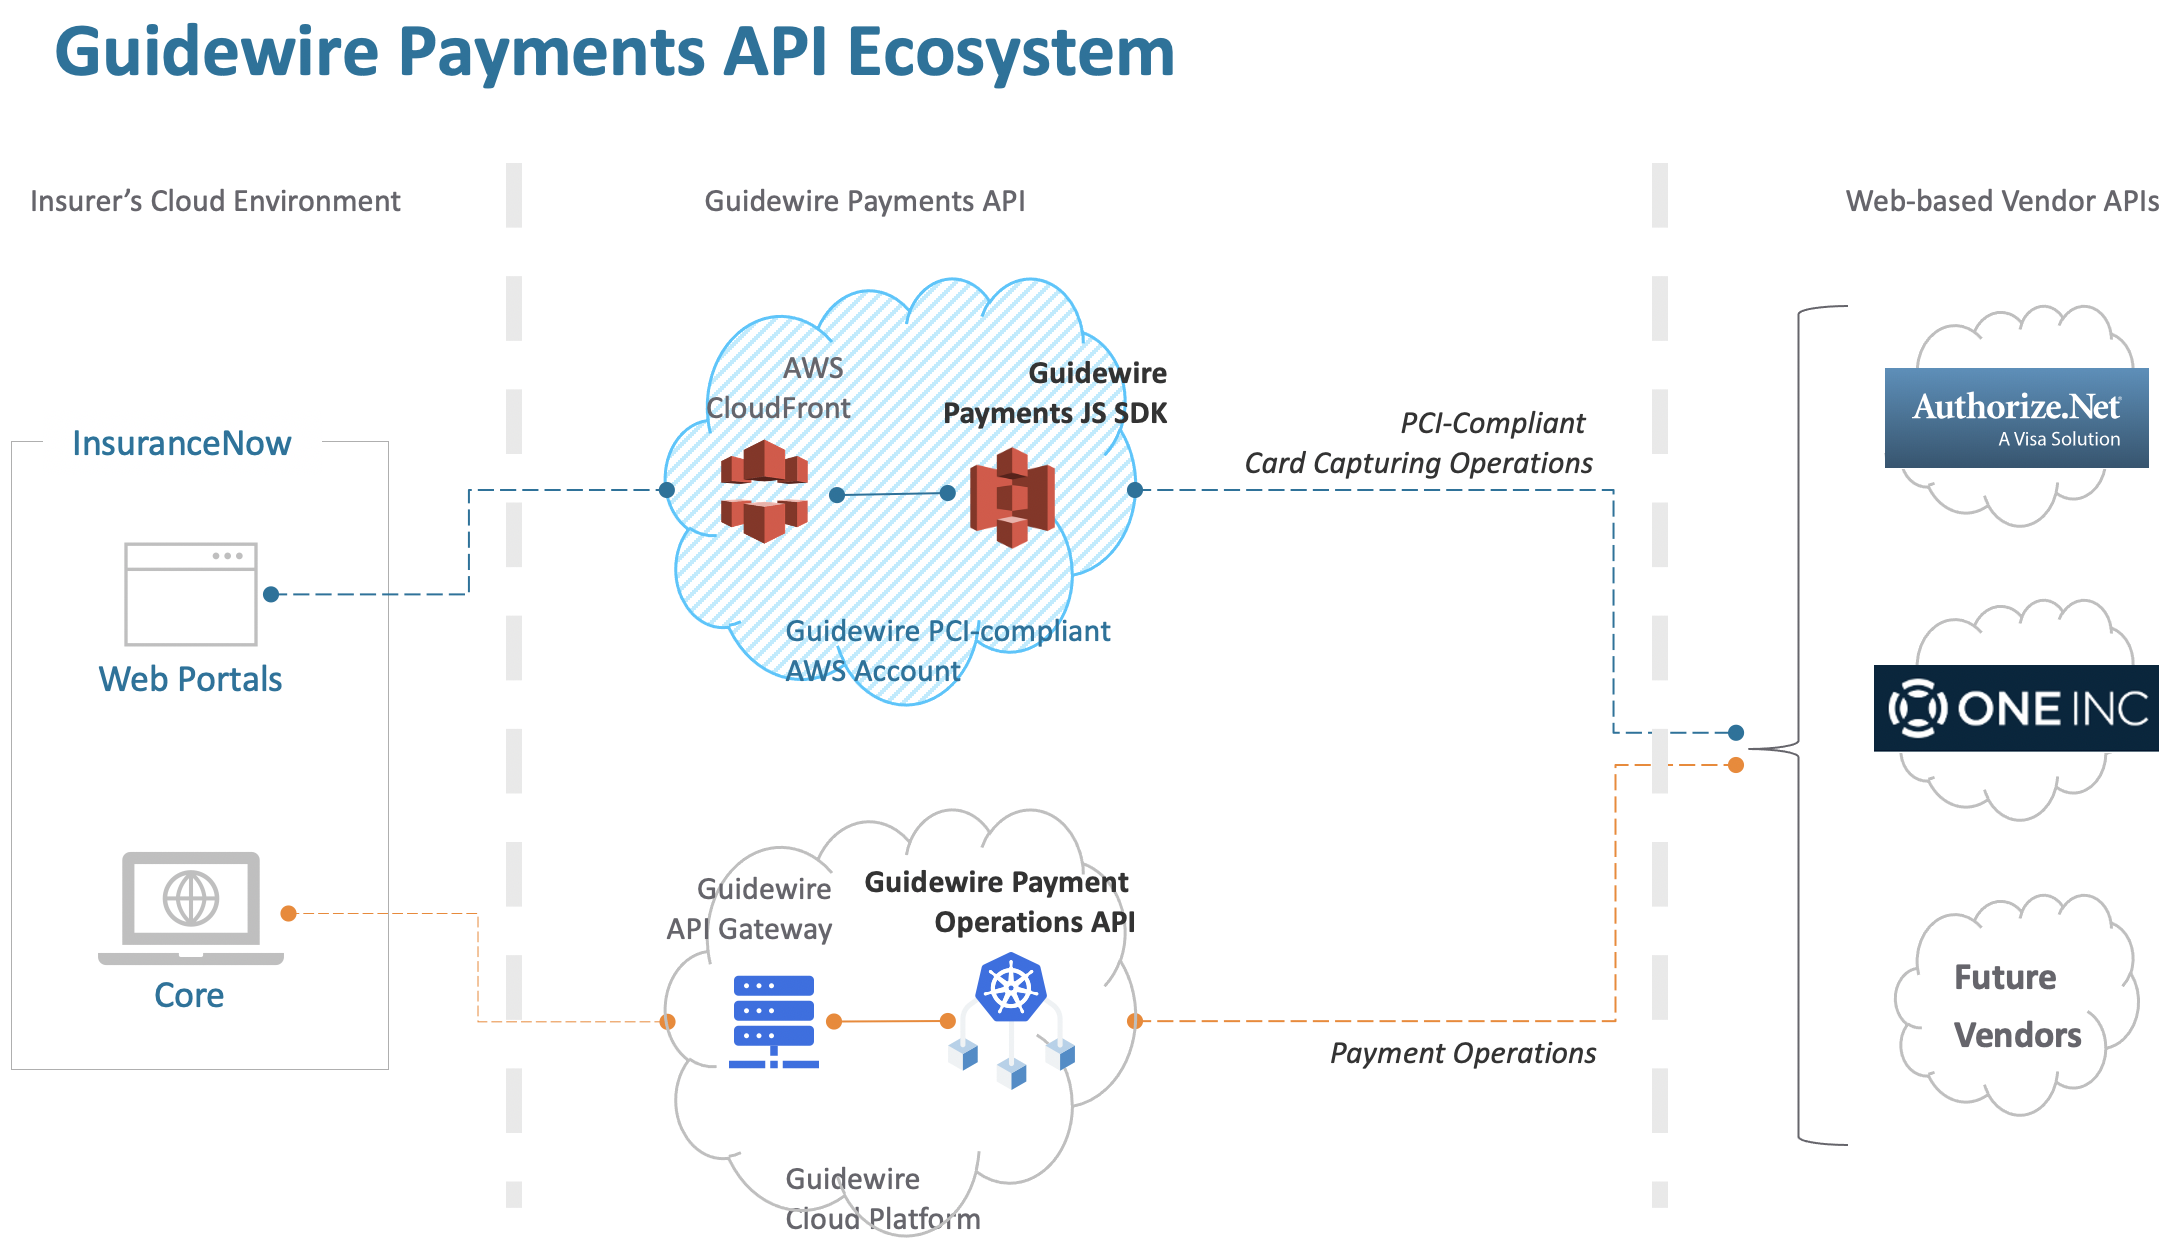
Delivered with the Banff release, the Guidewire Payments API is a new multitenant microservice for inbound payments. The Payments API externalizes payment integrations from Guidewire core systems, beginning with Guidewire InsuranceNow. It currently features integrations with the following payment gateway vendors:
Prior to Banff, the payment integration was built directly into the InsuranceNow application (the core application and the consumer and agent portals). Now, with the Banff release, InsuranceNow integrates with the Payments API, making your desired payment gateway vendor immediately available for use through a simple configuration. The following capabilities are available out-of-the-box:
- Reduced Payment Card Industry (PCI) compliance cost & risk
- PCI DSS Attestation of Compliance for handling of credit card Primary Account Numbers (PAN)
- Recurring PCI compliance audits
- Single Payments API for multiple vendors credit-card and ACH management
- Payment operations: authorize, capture, payment, debit, credit, void, & refund
- Support all standard international currency codes (defined by ISO-4217)
- Support for systems with multiple vendor payment gateway accounts
- Data Migration
- In most cases, migration to Payments API can be automated
- Maintain existing credit cards and transaction history
- Continuity of payment operations for core system and portals
The Guidewire Payments API guide is written to help developers quickly take advantage of this new service.
Getting Started with the Payments API
Prerequisites
Below are a few prerequisites that need to be accomplished before interacting with the Guidewire Payments API.
- Payment gateway vendor account: Create an account with your preferred payment gateway vendor.
- Guidewire KETI account: Your Guidewire technical point of contact can register with KETI and provide you with the keys required for secure communication with the Guidewire Payments API.
- Guidewire Payments API account: Your Guidewire technical point of contact can create an account by registering your payment gateway vendor keys and KETI kets.
Quickstart for the JS SDK
Step 1 – Include the JS SDK in your Web Portal
This script tag will use the JS SDK that is deployed to the Guidewire-owned, PCI compliant AWS account.
<script src="https://js-sdk-prod.payments.guidewire.net/v1/gw-payments-sdk.js"></script>Step 2 – Configure the JS SDK
Configure the JS SDK for the Insurer. This is initialized each time a credit card is added.
var config ={
    // your Payments API configuration id
    paymentConfigId:100,

    // your tenant which will be sent as the GW-Tenant header on API requests
    tenant:'tenant.acme',

    // OPTIONAL: url for the Payments RESTful API. The default is the production api at https://midas.us-east-2.service.guidewire.net/
    apiUrl:'https://midas.us-east-2.service.guidewire.net/',


    // OPTIONAL: description for the card
    cardDescription: '...',

    // customer info needed for "Add CC" call
    // Many vendors require customer address information for address verification (AVS) and fraud detection.
    customerAddress: '123 Main',
    customerCity: 'Birmingham',
    customerCountry: 'US',
    customerEmail: 'john.smith+test@gmail.com',
    customerFirstName: 'John',
    customerLastName: 'Smith',
    customerState: 'AL',
    customerZip: '35203',

    // OPTIONAL: feature flags
    featurePrefillAddress: true,
    featureCustomAddressCollection: false, // 'AUTHORIZE', 'ONEINC', 'STRIPE', '*', true, or false

    // OPTIONAL: ui customization
    uiAcceptJsButtonText: 'Save Card',
    uiAcceptJsHeaderText: 'Card Information',
    uiAcceptJsBillingAddressOptionsJson: '{"show":true, "required":true}',
    uiSdkAddressButtonText: 'Continue',
    uiSdkAddressHeaderText: 'Card Billing Address',
    uiSdkBackgroundColor: 'rgba(0, 0, 0, 0.1)',
    uiSdkCloseButtonAriaAndTitle: 'Close',
    uiSdkCloseButtonStyles: '',
    uiSdkHideLoader: false,
    uiSdkLoaderText: 'Loading...',
    uiSdkLoaderColor: '#434958',

    // OPTIONAL: vendor metadata
    // example for One Inc: [ { key: 'clientReferenceData1', value: 'POL330701-02' } ]
    vendorMetadata: [],

    // OPTIONAL: skips sending the credit card to the RESTful API. only used by Core systems that perform payment operations
    //DIRECTLY with the vendor
    skipAddCreditCardCall: false,

    // OPTIONAL: developer switches - default to false when omitted
    dev_enableVerboseLogging: false,
};
Required Fields The paymentConfigId and tenant are required. Optional Fields
apiUrl: This is the RESTful API URL. It can be omitted unless you need to test with a pre-production API.cardDescription: This information will be saved to the paymentSource description when the tokenized card info is saved.- Customer Address Fields: Most vendors require this information for Address Verification (AVS) and Fraud Detection. These are optional as each vendor account can be setup to apply different levels of security.
vendorMetadata: The vendor metadata fields are optional for each vendor. If the vendor does not support adding metadata it is safe to set these fields; they are just ignored in the flow.featurePrefillAddress: Setting this to true will prefill the address collection form with data you supply. Many implementations choose to supply their own address form to collect the necessary information. In this case, you would set the field to false.featureCustomAddressCollection: The SDK provides an optional form for address collection. It is recommended to set this field to false if you plan to provide your own address collection.featureCustomAddressCollectionoptions:
| Value | Type | Effect |
'AUTHORIZE' |
string |
Form will show when Authorize.net is the payment provider |
'ONEINC' |
string |
Form will show when One Inc is the payment provider |
'*' |
string |
Form will always show |
true |
boolean |
Form will always show |
false |
boolean |
Form will never show |
| If omitted or invalid, JS SDK defaults to ‘AUTHORIZE’ |
Step 3 – Initialize the JS SDK
Use the config created above when initializing the JS SDK.
var sdk = GuidewirePayments.createSDK(config);Step 4 – Launch the Credit Card Collection Form
Typically this is done on a user interaction (e.g., when the user clicks a “Add Credit Card” button). Below is a sample code snippet that illustrates how to launch the vendor form with comments where to add custom code to handle responses from the add credit card flow.
sdk.collectAndAssociateCard(function(result) {
    switch (result.type) {
        case 'ERROR':
            // custom code to handle error
            break;
        case 'CARD_ADDED':   // aka SUCCESS
            // custom code to handle card added
            break;
        case 'CANCELED':
            // custom code to handle user canceled
            break;
        case 'CARD_TOKENIZED':
            // custom code to handle only tokenize the card info
            break;
        default:
            console.warn('unexpected response type from JS SDK', result);
    }
});
4.1 – Success Response
This state indicates:
- We successfully collected the card information
- Transmitted the card information to the payment gateway vendor and received a token
- Saved the token in the RESTful API
Once the credit card information has been securely sent to the vendor, the vendor will issue a token back to the JS SDK. The JS SDK will automatically send this token to the RESTful APIs for storage and retrieve a Payment Source ID that is persisted on the Insurer’s Core system for future use via the RESTful APIs. The Payment Source ID is found in the card.id field in the sample success response below:
{
    "type": "CARD_ADDED",
    "card": {
        "id": 1101,           <-- Payment Source ID to be saved in Core system
        "firstName": "John",
        "lastName": "Smith",
        "address": "123 Main",
        "city": "Birmingham",
        "state": "AL",
        "country": "US",
        "zip": "35203-1234",
        "email": "john.smith+test@gmail.com",
        "isActive": true,
        "description": null,
        "cardType": "Visa",
        "lastFour": "1111",
        "expDate": "02/20"
    }
}
4.2 – Error Response
This state indicates that an error occurred during transmitting credit card information to the payment gateway vendor or sending the credit card token to the RESTful API. Example Error Response For API Failure:
{
    "type": "ERROR",
    "apiError": {
        // details of the failed API request (if any)
        "title": "unauthorized-data-access",
        "status": 403,
        "detail": "Not authorized to access requested data. Verify proper permissions have been granted for access."
    },
    "debug": {
        // details that may help the Payments API team debug what went wrong
    }
}
4.3 – User Cancellation
This state indicates that the user has closed the modal before saving a card, result.type will be ‘CANCELED’. Note: because the collection form is implemented by the vendor, we cannot disable this option. Example Cancellation Response:
{
    "type": "CANCELED"
}
Related Info
QuickStart for the RESTful API
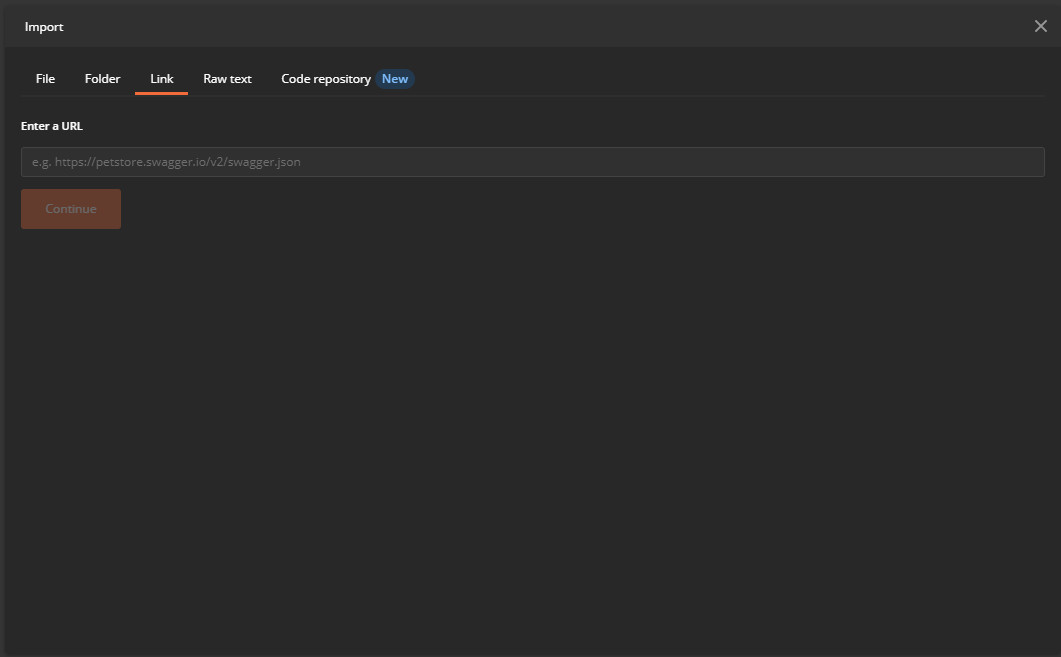
This quick start will illustrate interacting with the RESTful APIs via Postman.
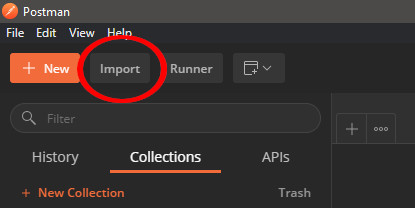
Step 1 – Set up Postman
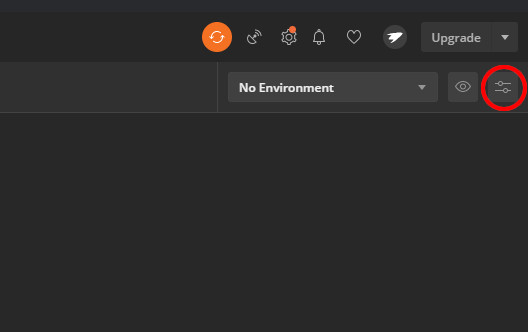
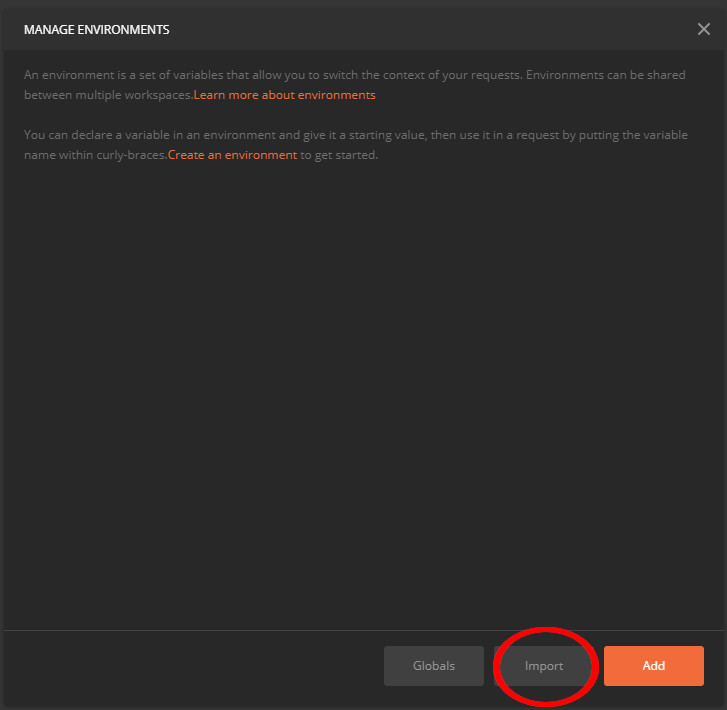
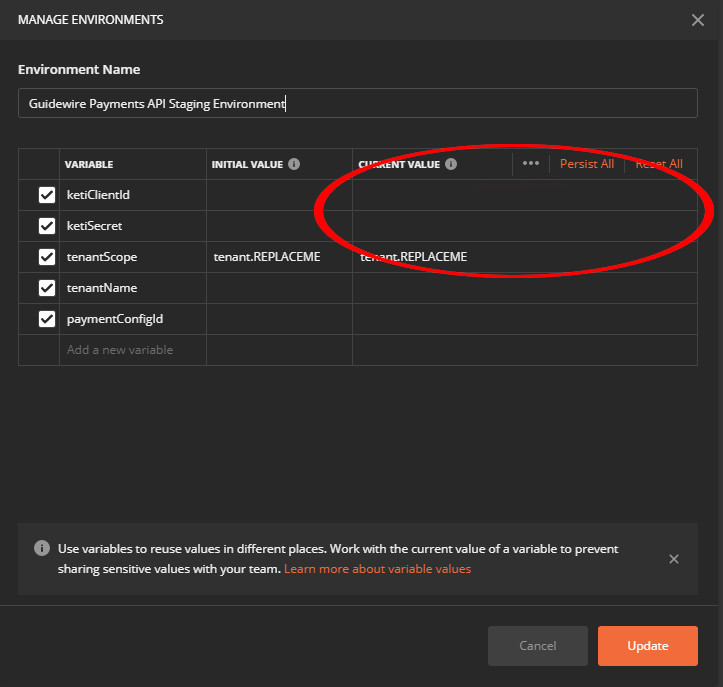
1.1 – Download environment
Save the following json to a file:
{
"id": "aff3176a-fa6c-4fa6-b16c-cd990446e686",
"name": "Guidewire Payments API Staging Environment",
"values": [
{
"key": "ketiClientId",
"value": "",
"enabled": true
},
{
"key": "ketiSecret",
"value": "",
"enabled": true
},
{
"key": "tenantScope",
"value": "tenant.REPLACEME",
"enabled": true
},
{
"key": "tenantName",
"value": "",
"enabled": true
},
{
"key": "paymentConfigId",
"value": "",
"enabled": true
}
],
"_postman_variable_scope": "environment",
"_postman_exported_at": "2020-10-06T17:01:57.540Z",
"_postman_exported_using": "Postman/7.33.1"
}
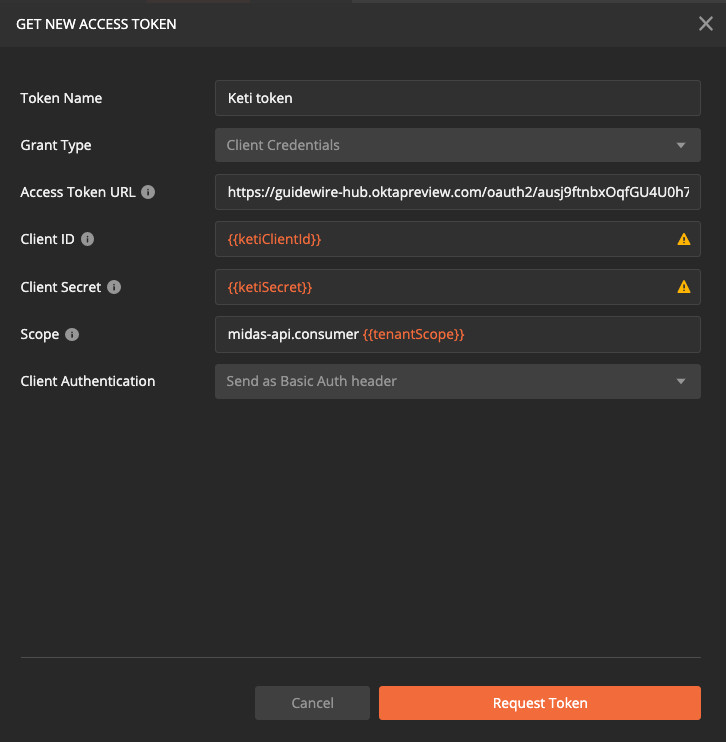
Step 4 – Get an access token
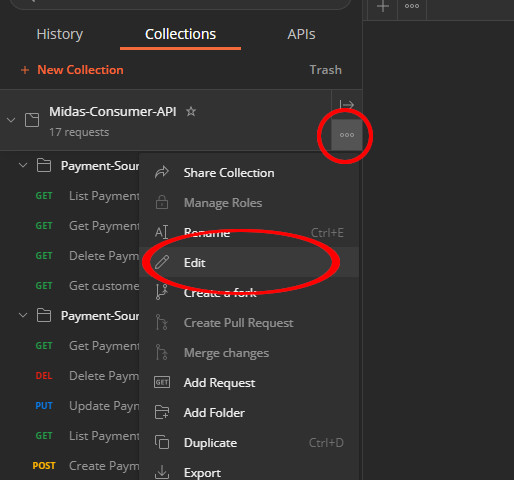
An access token is required for interacting with the Guidewire Payments API. Access tokens can be reused for multiple API calls until the token expires. Click the ellipsis on the Midas Consumer API collection and select the Edit menu item.
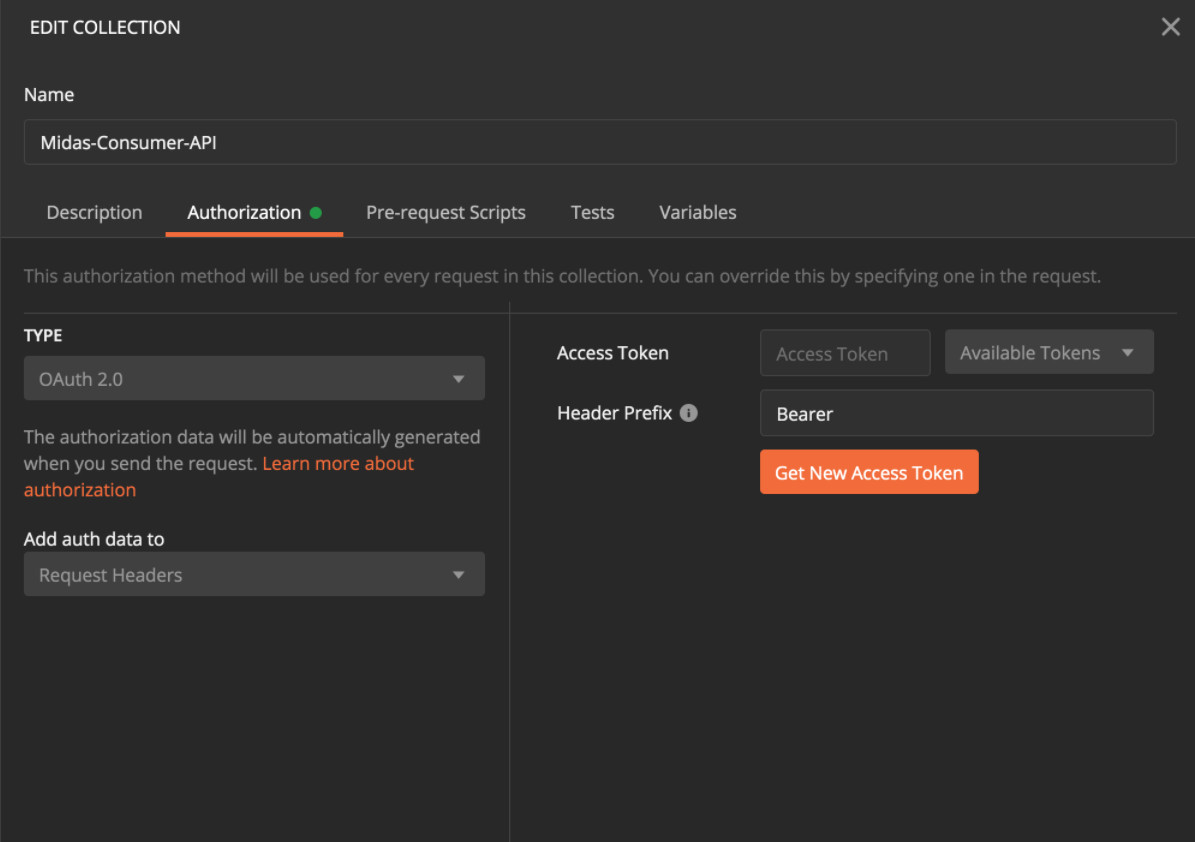
Select the Authorization tab and set the following values:
- Type: OAuth 2.0
- Header Prefix: Bearer
Click Get New Access Token and then Request Token on the next menu.
You are now ready to use the Guidewire Payments API!
Related Info
Transaction Status & Workflows
A transaction represents a request from your service to perform a payment operation (e.g., payment, refund, void).
Transaction Status
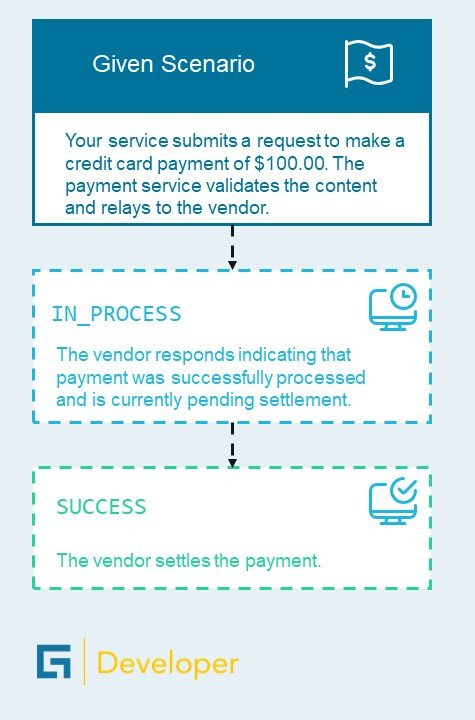
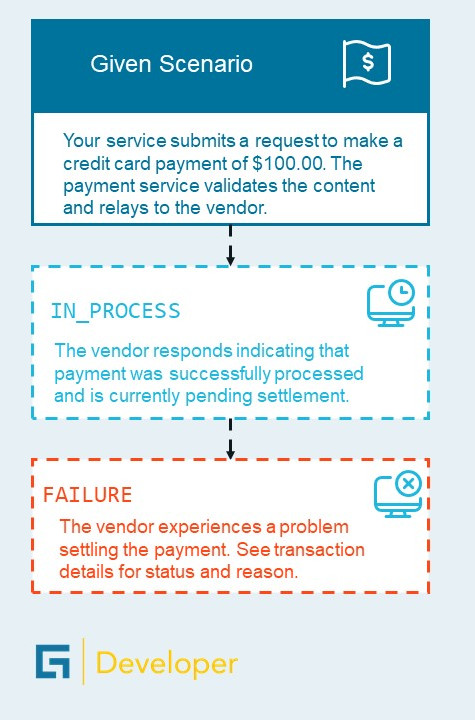
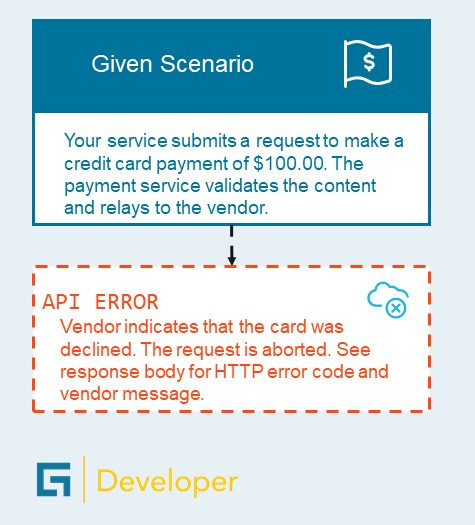
When your service initiates a payment operation request, the RESTful APIs will delegate the call to the payment vendor and respond to your service with one of the following:
- A transaction object with a state of
IN_PROCESS,SUCCESSorFAILURE - An HTTP error representing an error while processing the request
The three statuses for a transaction are described as:
IN_PROCESSis a non-final state indicating that the transaction is being processed by the vendorSUCCESSindicates that the transaction completed successfully. For example, a settled payment or a voided paymentFAILUREindicates that the transaction failed to complete successfully. For example, Not Sufficient Funds or Disputed Charge
Transition Rules
Some rules about transaction status. A transaction may:
- Move to a new status by an operation performed by a payment vendor (e.g., a payment settles overnight)
- Move to a new status by an operation performed by your service (e.g., voiding a previous payment)
- Transition from
IN_PROCESStoSUCCESSorFAILURE - Go directly to
SUCCESSwithout enteringIN_PROCESS - Result in an
API ERRORreturned to your service without ever creating a transaction entity (e.g., a failed request)
The image below shows the possible flows described by the rules above:
Example workflow (click to enlarge).
Related Info
About the Author

Matt Salerno
Software Architect | Lead Engineer, Guidewire Payments API
Matt is part of the Cloud Common Services group where he is the lead engineer for the Guidewire Payments API. He is full-stack + cloud-based engineer with 20+ years of experience creating enterprise-level software products, When he is not writing software for Guidewire, Matt practices martial arts, researches machine learning and enjoys time with his family.
